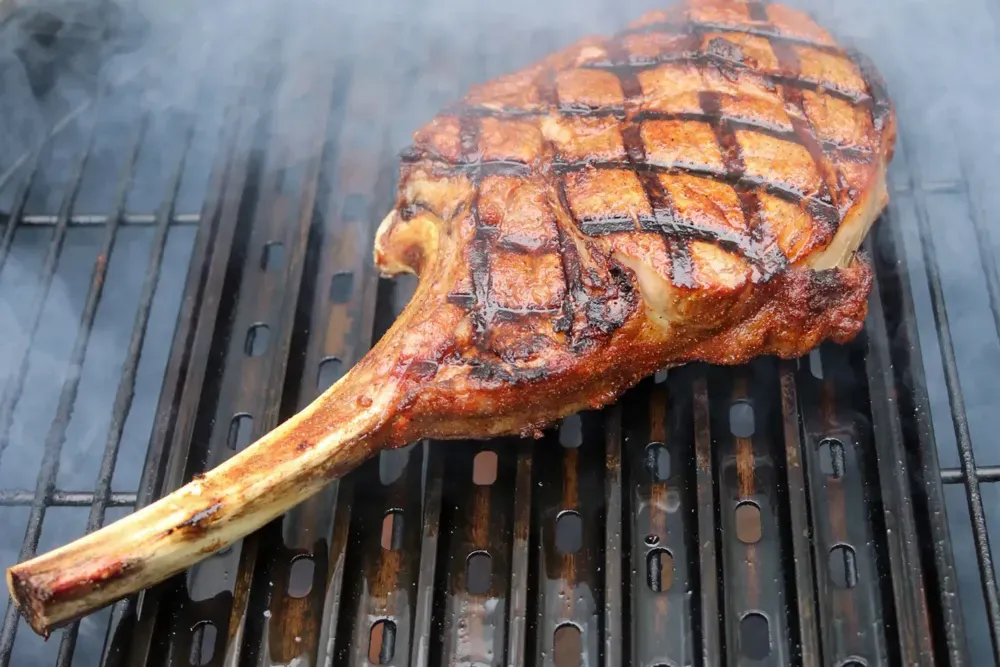
 Grilling chicken (as opposed to smoking it or roasting it) presents its own unique challenges. Chicken is practically flammable on the grill, let alone when you add sauces or marinades. There’s also the challenge of cooking it until it’s done without overcooking it and drying it out. But rest assured, grilled chicken of any kind is where GrillGrates SHINE. No more dried out chicken breasts or bonfire chicken. GrillGrates provide even heat and tame flames to give you an even cook and juicier, more flavorful meat.
We hear from customers all the time who are delighted with how much better their chicken is on GrillGrates and we think you’ll agree.
…Let’s get started!
Before we can talk about how to cook our chicken, we should talk about what parts of the chicken.
Breast: This is the leanest part of the chicken, good for people who are looking to eat healthy. White meat chicken is a blank canvas for flavoring. Careful not to overcook it though, chicken breast can dry out fast!
Tenderloin: Also a lean, white meat cut located right behind the breast. They too can dry out quickly, so use caution not to overcook them.
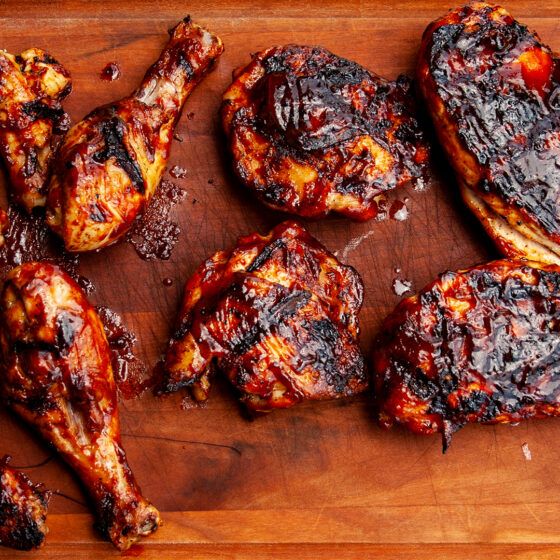
Wings: Wings consist of the wing portion (the flat) as well as the drumette. Because of the skin and higher fat content, wings are great for frying and grilling as the skin holds sauce well and they tend to stay juicier. Wings are everyone’s favorite bar food and game day snack, especially for the fact that you can eat them with your hands.
Drumstick: Mostly dark meat cut with the skin on is great for saucing up, which makes it a BBQ favorite. Because of the skin and the dark meat, they tend to be juicier as well.
Thigh: The thigh is usually attached to the drumstick and is also a juicy, dark cut of meat. Because of their shape and skin they hold sauce and seasoning very well so they’re flavorful. Unlike breasts, you can afford to let these get to a little bit higher, around 180°F is perfect for thighs.
For any of these cuts, you can either get them pre-packaged at the store OR you can buy and butcher your own chicken (which is much cheaper). Our own Chef Michael did a great little how-to video for butchering your own chicken. Check it out!
For all the below methods (with the exception of #8) we recommend the following grill setup:
- You can use any fuel source or grill type (gas, charcoal, pellet, kamado).
- With GrillGrates, we suggest direct heat to grill your chicken. No need for indirect heat or two-zone grilling! This is because GrillGrates help control flare-ups so there’s no risk with having your chicken directly over the flame or heat source.
- Additionally, GrillGrates even out hot and cold spots on your grill, eliminating the need for “safe zones” and allowing you to FILL THE GRILL and make use of every inch of space!
- We recommend having your grill at medium-high heat, between 450°F to 550°F at the grates*.
*Not sure how to check the temp at the grates? We recommend this laser thermometer.
Method #1 and #2: Grilled Chicken – Seasoned or Sauced
- First, you’ll want to butcher or buy your desired cuts of chicken.
- Prep your grill using the above recommended grill setup.
- Season your chicken with the seasoning of your choice (or at least salt & pepper).
- When placing pieces on your grill, place similar cuts together in the same area. This will help when checking the temperature of your pieces and knowing which cuts should come off when.
- Close your lid and check the chicken after about 5 minutes. Adjust your grill temps accordingly (remember we’re trying to get a crispy brown exterior not burn it).
PRO TIP: If your sear marks are black, your grill is too hot! Golden brown sear marks are the sign of a perfect cooking temp.
- Lift, twist and flip every few minutes until your pieces reach temperature. Pull breasts as soon as they reach 165°F*, other pieces such as thighs and drumsticks can cook a longer without risk of drying out, 180°F* is ideal.
- For BBQ chicken – apply sauce ¾ of the way through your cook. Sauce tends to burn, we just want to get it to caramelize and get crispy, not burn.
*Still cutting your chicken to check if it’s done? It’s time for a Temp & Time Thermometer! This instant-read thermometer is a must-have for any serious griller.
Method #3: Boneless Skinless Chicken Breasts 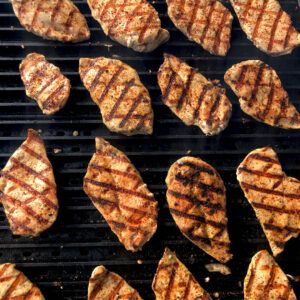
- Start by flattening out your chicken breast. Sam the Cooking Guy does a great job explaining why we do this, in this video. You can use a meat tenderizer or even a whiskey bottle. Flattening out the chicken ensures it will cook more evenly so you don’t end up with a super dry end and an uncooked end.
- Prep your grill using the above recommended grill setup.
- Season your chicken with the seasoning of your choice (or at least salt & pepper). Remember that boneless, skinless chicken breast tends to be a bland meat, so be bold with your seasoning!
- Close your lid and check the chicken after about 5 minutes. Adjust your grill temps accordingly.
PRO TIP: If your sear marks are black, your grill is too hot! Golden brown sear marks are the sign of a perfect cooking temp. - Lift, twist and flip every few minutes until your pieces reach an internal temp of 165°F and don’t let them go much longer than that. Remember that boneless skinless breasts get GORGEOUS sear marks on GrillGrates so be strategic with your flips. If your chicken is stickin’ you’re moving it too much!
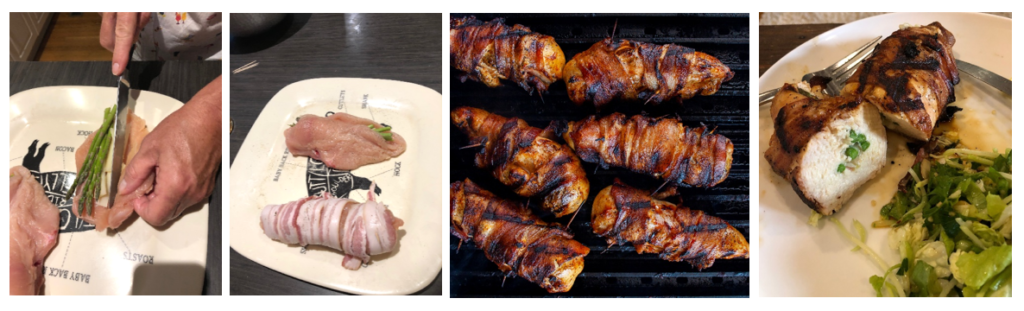
Method #4: Bacon Wrapped Chicken Breast
- When selecting breasts for this, try to get pieces that are fairly uniform in size so they’ll cook at a similar rate.
- Season your chicken with the seasoning of your choice (or at least salt & pepper).
- You’ll want to use thick cut bacon and about 5 to 6 toothpicks (extra-long if you can find them) per breast to secure the bacon. Wrap the breast with the bacon and overlap it at the end, then secure with a toothpick. Repeat the process until the entire breast is covered.
- Prep your grill using the above recommended grill setup.
- Place pieces on the grill. We recommend letting the chicken cook for about 8 to 10 minutes before you flip. Don’t worry so much about sear marks, for this method your main concern is getting the bacon crispy and cooking the chicken to temp (165°F). The “kickstands” that the toothpicks create a perfect for holding the chicken up at odd angles to ensure you can get all the bacon crispy.
- When you’re done cooking, be sure to remove all toothpicks before serving!
Method #5: Marinated Thighs
- For this method, you can use bone-in or boneless, skin-on or skinless chicken thighs. We’ll be using boneless skinless chicken thighs to really allow our marinade to sink in.
- We whisked together the following marinade in a non-reactive bowl:
Chef Michael’s Marinade (makes about 2 cups
1.5 tablespoons fresh rosemary- minced
Zest and juice from 3 large lemons
10 cloves of garlic- minced
2 teaspoons kosher salt
2 teaspoons fresh cracked black pepper
1.5 cups Extra Virgin Olive Oil
- Place your chicken thighs in a large Ziplock bag and pour in marinade. Seal and refrigerate. Due to the high acidity do not marinate for more than two hours*.
- Prep your grill using the above recommended grill setup.
Please Note: Boneless, skinless thighs will cook much faster than bone-in, skin-on thighs.
- If cooking thighs with the skin on, make sure you start skin-side down. Do the usual lift, twist, turn every 5 minutes or so until you reach 180°F. Remember, if your chicken sticks, you’re moving it too much.
PRO TIP: If your sear marks are black, your grill is too hot! Golden brown sear marks are the sign of a perfect cooking temp.
- If you’d like, you can pour your extra marinade right over the top of the chicken while it’s on the grill. Just make sure to do it early so any bacteria from the chicken cooks out.
*For marinades with high acidity, you only need to marinade for a short amount of time (no more than 2 hours) vs. less acidic marinades which can sit for a longer amount of time (2 to 4 hours, or possibly even overnight).
Method #6: Chicken Wings
- You can either start with fresh wings, frozen wings (defrost first), or you can butcher your own wings. Butchering will just involve separating the drum from the flat and removing the wing tip.
- Season your chicken with the seasoning of your choice (or at least salt & pepper).
- Prep your grill using the above recommended grill setup.
- Place your pieces on the grill either left to right or front to back and keep that method in mind. You’ll flip them, check temps and then remove them in this same pattern.
- If saucing your wings, make sure you add BBQ or Wing Sauce ¾ of the way through the cook. Sauce tends to burn, we just want to get it to caramelize and get crispy, not burn.
- As with all your chicken, we need to reach at least 165°F before removing, keep in mind that wings cook quickly!
Method #7 Spatchcocked Chicken
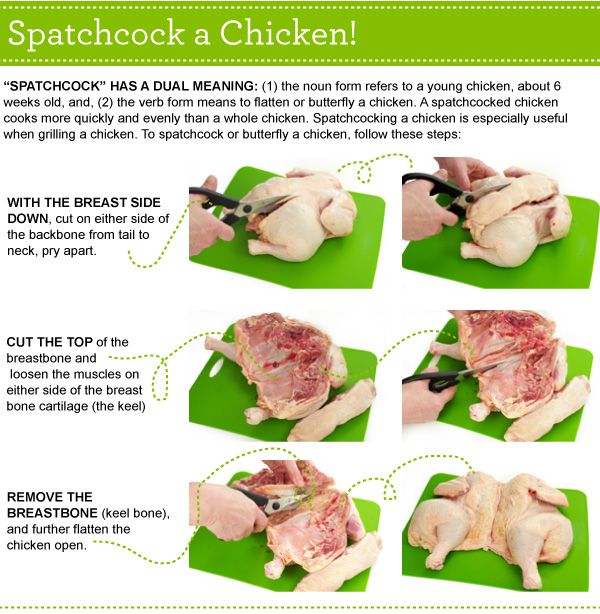
This diagram does a great job explaining what spatchcock is, and how to do it. Spatchcocking a whole chicken is less expensive than buying separate chicken pieces. It’s also the best way to evenly cook a whole chicken!
- After you’ve spatchcocked your chicken, season with the seasoning of your choice (or at least salt & pepper).
- Prep your grill using the above recommended grill setup.
- Place your chicken on the grill bone side down, skin side up. More than half of your cook time will be spent this way, flip to skin side to crisp up the skin.
- Be sure to check multiple parts of the chicken before removing from the grill. Cook your chicken breasts to temp (165°F), drumsticks and thighs are safe to cook to 180°F.
- Cut the chicken up into separate pieces before serving.
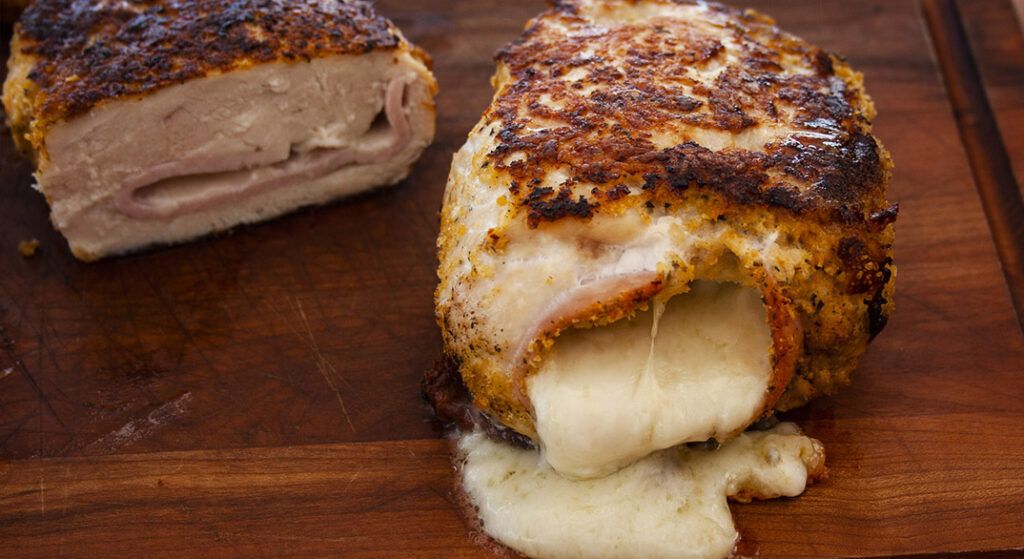
Method #8: Pre-made Chicken Cordon Bleu
- Most supermarkets carry a good variety of pre-made options like pinwheels, stuffed breasts and chicken cordon bleu.
- For these, you’ll want to flip your grates over so you can cook on the flat side OR if you own a Griddle, that’s even better.
- Prepare your grill and fire it up. Oil the back side of the grates/the griddle to help make the surface non-stick. We recommend either Canola Oil or Duck Fat Spray. You’ll want your grates to be 400°F to 450°F at the surface. If you cook the Cordon Bleu too hot, the cheese will melt too quickly and ooze out. Additionally, flipping too often may cause the piece to fall apart.
- Cook for approximately 5 to 6 minutes per side, or until you achieve a 165°F internal temperature.
Grilling chicken on GrillGrates takes it from ordinary to extraordinary. GrillGrates allow you to enjoy the perks of cooking on the grill: grilled flavor, crispy skin, delicious caramelized sauces, rubs and marinades and of course, SEAR MARKS! At the same time, the grates protect chicken from drying out or burning, leaving it juicier and more tender than traditional grilling.
How are you grilling your chicken with GrillGrates? Send us an email and tell us what you’ve been up to! We may even share it to our Grate Techniques Page.
GrillGrate. Eat Well.
– Meagan
Related Posts
Top 5 Spring Grilling Recipes
The birds are singing, the wildflowers are in bloom and it’s time to have
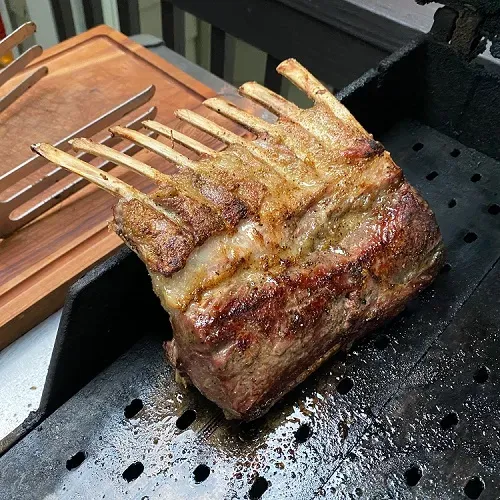
Grill[GRATE] Lamb for Easter
The beauty of lamb is the wide variety of cuts and flavors that are available.
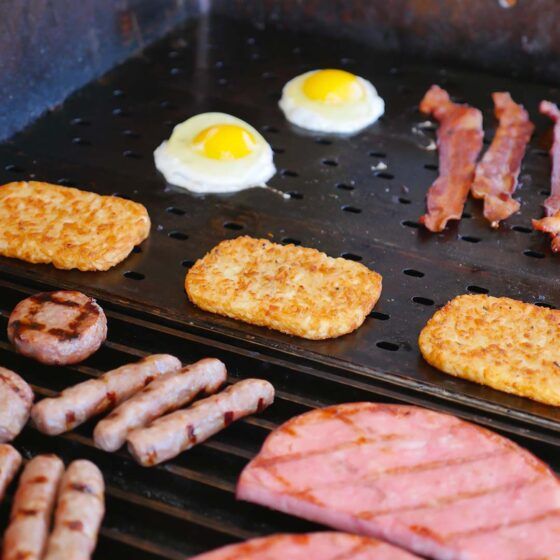
Grilling Breakfast is Fun, Fast, and Easy
Nothing shows off the versatility of GrillGrates more than grilling breakfast.
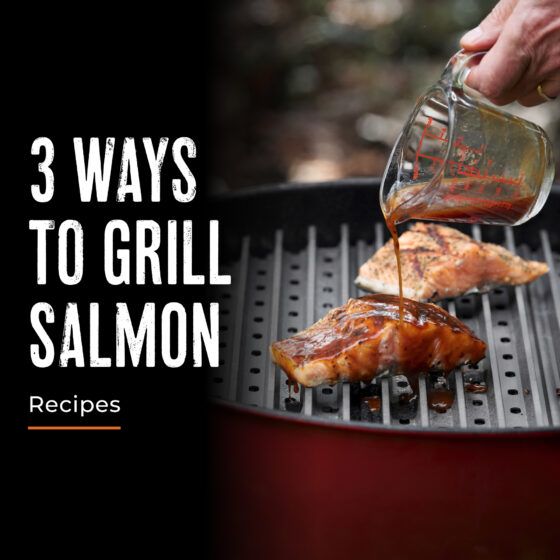
3 Ways to Grill Salmon
Salmon is the ideal fish for grilling. Its sturdy flesh holds together well on